
Here’s my take on someone else’s take on a granola bar recipe by King Arthur Flour (I hear their whole wheat muffins are knockout, too). Eventually I’ll get around to trying those granola recipes from a few weeks ago; I’m sure some of them would be great as bars …
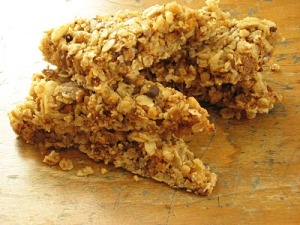
Easy, Chewy Granola Bars
Makes: 1 small pan
- 1 2/3 cups quick
rolledoats (if gluten-free, be sure to use gluten-free oats. I think you can get away with normal oats if you triple the water?) 1/2 to 3/4 cup granulated sugar(use more for store-granola-bar-sweet. I wanted way, way, less, so I substituted this with 2 packets of Splenda and added a tablespoon of maple syrup later)- 1/3 cup oat flour (or 1/3 cup oats, processed till finely ground in a food processor, blender, or mortar and pestle) I used the mortar and pestle, and added the 1/8 cup rice flour I had made ages ago.
- 1/2 teaspoon salt (I omitted it; the PB has enough salt)
- 1/4 teaspoon ground cinnamon
- Smidgin of freshly ground nutmeg
- 2 to 3 cups dried fruits and nuts (total of 10 to 15 ounces – I did 2/3 cup slivered almonds, 2/3 cups walnuts minced fine, and just under 2/3 cups finely chopped coconut. It came out cohesive but a little dry; you need some fruit in there to make it really “chewy”)
- 1/3 cup peanut butter or another nut butter, optional (I used chunky peanut butter)
- 1 1/2 teaspoon vanilla extract, optional
- 6 tablespoons melted butter
- 1/4 cup honey, maple syrup or corn syrup (I did honey, half safflower and half sage since I like that darker, nuttier taste. Sage is on the light side; safflower is pretty strong, so if you use all-safflower, might want to cut down on this and up the water a bit.)
- 2 tablespoons light corn syrup (I used 3 of light maple syrup)
- 1 tablespoon water (I forgot this part. oops)
1. Preheat oven to 350° F. Line an 8″ x 8″ x 2″ pan with parchment paper; lightly grease it with the paper from the butter.
2. In one bowl, combine all dry ingredients; in another, smaller one, all wet (peanut butter is wet). Mix each thoroughly; for the wet, mash the peanut butter so it incorporates as much as it can. Thoroughly mix the wet into the dry.
3. Put mix into parchment-lined baking pan and press down using the back of a largish spoon, saran wrap, or your hand covered with a sandwich bag (or your hand, if you don’t mind losing some of your creation on your hand and having to lick it off). Bake for 30-40 min until golden brown on edges. They can be dark / toasted-looking, depending on what you put into it — when they’re done, they should give a little in the middle, and still be softish from the heat, but they should have hardened up enough that it’s reasonable to think they’ll harden completely when they’ve cooled.
4. Cool completely on a cookie rack; if it’s necessary, chill in fridge 30 min to ensure they’re totally cool. Cut with a serrated knife. To store, wrap individually an keep in an airtight container in fridge. They freeze well.
